
Contents
Creating A New Gaming Setup Post
Creating An Instagram Post
Creating A New Article Post
Creating A New Gaming Setup Post
Go to Instagram and log in with the following account:
Username: pimpedsetups
Password: Wolly_2006
Either browse through the home page, or search for ‘gaming setups‘ until you find a suitable example. (Check against your own Instagram feed to make sure it hasn’t already been used.)
If browsing through the home page, click the three dots in the top right corner of the post and choose ‘Copy link‘.
If looking at posts through a search, click the post to open it, then click the three dots in the top right corner and choose ‘Copy link‘.
Go to https://toolzu.com/downloader/instagram/photo/
Paste the Instagram link you just copied into the box, and click the blue ‘Download‘ button on the right.
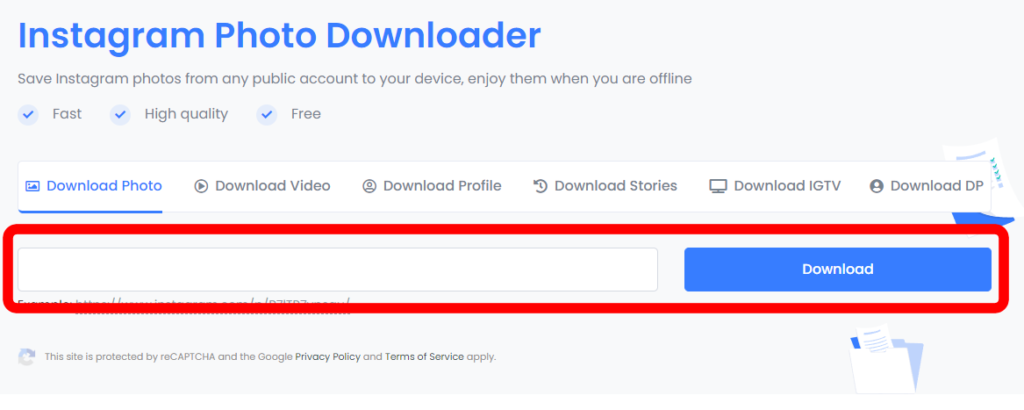
After a few seconds you will see a small copy of your picture. Click the ‘Download’ button immediately underneath it to save the photo to your computer. An advert might appear. Close this to start the download.
Go to http://pimpmysetup.co.uk/wp-admin/index.php
If you need to log in, these are the details:
Username: jack@jackarnold.uk
Password: Wolly_2006
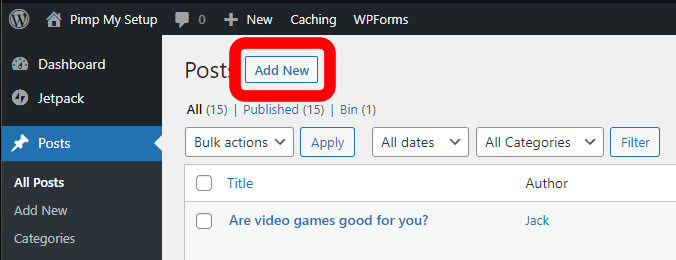
In the grey section on the left, click once on ‘Posts‘.
In the main section of the page, in the top left corner, click ‘Add New‘.
Click in the section ‘Add title‘ and add a short, descriptive title. Use a similar format to the posts already published. Make sure every word begins with a capital letter.
Click underneath in the section ‘Type / to choose a block‘ and type 2-3 sentences talking about the gaming setup. Point out good features, unusual choices, what stands out, what makes it different.
Once you have finished typing your few sentences, press ‘Enter‘.
In the ‘Type / to choose a block‘ section that appears, type ‘/im‘ (without the speech marks). From the menu that appears, click ‘Image’.
Click the ‘Upload‘ button, and find the image you saved earlier.
Once the image has loaded, click it once to select it, then click the Right Arrow on your keyboard, then press ‘Enter‘.
In the ‘Type / to choose a block‘ section that appears, type ‘/col‘ (without the speech marks). From the menu that appears, click ‘Columns‘.
A columns panel will appear. Choose the ’33/33/33′ three column option.
As soon as the three column block has been inserted, click the Select Columns button at the top left:

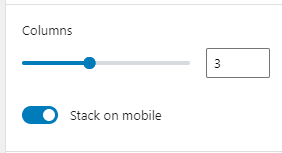
On the right hand side of the screen you will see a slider next to the number of columns. Change this to ‘6’ columns.
Go back to the columns block underneath your photo. You will see six columns, each with a large ‘+’ button in it. Click the first ‘+’ button:

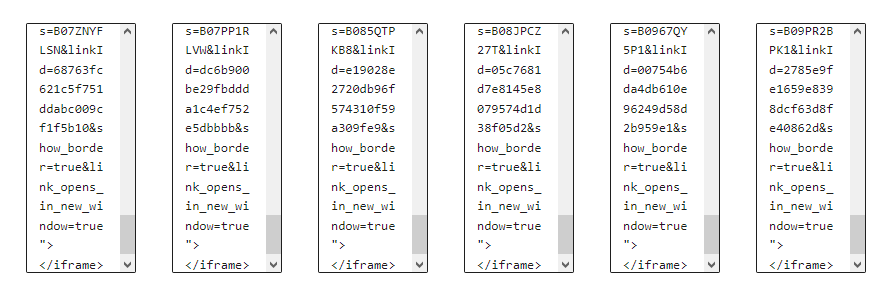
A search box will appear. Type ‘cust‘, and then choose ‘Custom HTML‘.
Now go along the remaining 5 columns and change each of them to ‘Custom HTML too. You won’t need to search for it as it will appear in the popup search box.
Now go to https://www.amazon.co.uk and log in with the following details:
Username: jack@jackarnold.uk
Password: Wolly_2006
You will now need to choose one of the items from the gaming setup photo, and find it on Amazon. You may find that some items have already been identified in previous posts, so you can refer to these (such as 3D tiles). Try to get as close as possible.
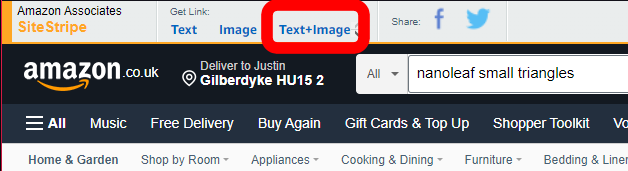
Once you have found a product, and opened its page, look at the very top of the screen and you will see a tool bar with ‘SiteStripe‘ on the far left. Click the option that says ‘Text+ Image‘, and then press Ctrl+C to copy the code that appears.
Go back to your website, and in the first ‘Custom HTML‘ box, paste all of the code you copied from Amazon.
That is the first product listed. You will now need to add more.
You should aim to have all six columns filled with code, so that you have six Amazon products listed.
If you need to add more, you can add another Columns block, increase it to six columns, change them all to Custom HTML, and keep going. Don’t add more than 10 items.
Make sure you aren’t clicking inside any of the boxes, and you don’t have any boxes selected. On the right hand side of the page you will see two tabs – ‘Post‘, and ‘Block‘. Make sure ‘Post‘ is selected.
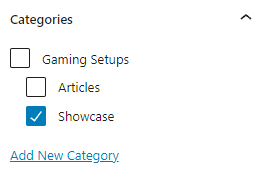
In the ‘Categories‘ section make sure only ‘Showcase‘ is ticked.
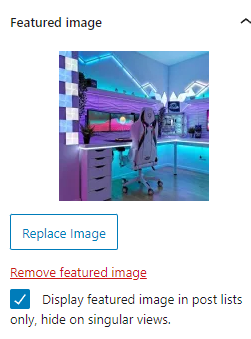
In the ‘Featured image‘ section, click the grey rectangle labelled ‘Set featured image‘, and select the same image you used for the post. Once selected, click the blue ‘Set featured image‘ button at the bottom right corner to return to your post.
Tick the box labelled ‘Display featured image in post lists only, hide on singular views.‘
At the top right corner of the screen, click the blue ‘Publish‘ button, and then confirm.
You have now finished creating your new post. The next step is to promote it on Instagram.
Creating An Instagram Post
Go to Instagram and log in with the following account:
Username: pimpedsetups
Password: Wolly_2006
Click the ‘+’ button at the top of the screen to create a new post, and then upload the same photo you used for the post.
You can resize and adjust the photo if needed. Then click ‘Next’. Don’t add any filter – just click ‘Next’ again.
Copy and paste the text below into the Instagram post:
👉 Visit pimpmysetup.co.uk to learn how to get this look! 👈 ⭐️ Follow @pimpedsetups for more setup content! ⭐️ ========================== Credit: @ / (DM for credit or removal) ========================== Follow @pimpedsetups 🔥 ========================== ►► Visit http://pimpmysetup.co.uk for gaming gear! ◄◄ ========================== [ 💚 Like 💚] [ 💙 Comment 💙 ] [ 💜 Share 💜] [ 🔖 Tag a friend 🔖 ] ========================== 🔖 Tags 🔖 ==========================
Go to https://www.hashzag.com/dashboard
Username: jack@jackarnold.uk
Password: Wolly_2006
On the left hand side, click the ‘Generate Set‘ button:
Change the Set size to 20.
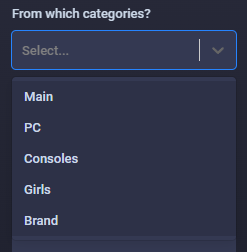
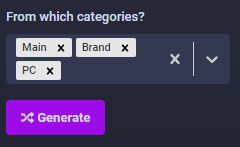
From the Categories menu, always choose Main and Brand. Ten select whether to choose ‘PC‘ or ‘Consoles‘, and whether to include ‘Girls‘, depending on the type of gaming setup shown in the image you’re posting.
Once you’ve selected your categories, click the pink ‘Generate‘ button:
Then click the pink ‘Copy‘ button:
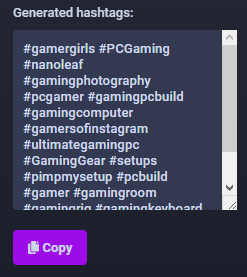
Go back to Instagram, and click in the text part of your post. Underneath the ‘Tags‘ section, paste the generated tags.
Click ‘Share‘ at the top right corner to publish your Instagram post.
Creating A New Article Post
Go to https://www.google.com
Sign in with the following details:
Username: contact@thedailythunk.com
Password: Kodo_2006
Go to https://app.copy.ai/
Click ‘Continue with Google‘.
Once logged in, click the ‘Blog Post Wizard‘ button.
Enter an article title. (To get ideas, go to https://seopressor.com/blog-title-generator/ and enter terms such as ‘gaming’, ‘console gaming’, ‘video games’, ‘vr games’, ‘retro games’ and so on. Feel free to come up with your own ideas, or adapt the ones generated.)
In the ‘keywords‘ section you can just paste the article title again. Add any really important keywords you want it to include, such as ‘console’, ‘Microsoft’ etc. Keep this limited.
Keep the ‘Tone‘ set to ‘Friendly‘.
Click ‘Generate Outline‘.
Once it has generated the section titles, have a look through and see if it makes sense. These should be a list of 6+ short statements about the topic. Feel free to click ‘Regenerate All‘ if needed.
Once you’re happy with the section titles, click ‘Generate Talking Points‘.
You should now see a list of bullet points under each title. Check that these look right. Click ‘Regenerate Talking Points‘ underneath any section that doesn’t look right.
Once you’re happy, click the ‘Generate Content‘ button.
You should see a rough copy of your final article. Check through to make sure it;s turned the bullet points into proper paragraphs. If any section doesn’t seem right, click the ‘Regenrate Content‘ link underneath that section.
Once you’re happy with the rough copy, click the ‘Create Blog Post‘ button.
Go to either https://www.pexels.com or https://unsplash.com and find a suitable image to go with the article. Download the image to your computer.
Go to http://pimpmysetup.co.uk/wp-admin/index.php
If you need to log in, these are the details:
Username: jack@jackarnold.uk
Password: Wolly_2006
In the grey section on the left, click once on ‘Posts‘.
In the main section of the page, in the top left corner, click ‘Add New‘.
Copy and paste the article title from Copy.ai into the new post, where it says ‘Add Title‘.
Copy the whole of the rest of the article except for the ‘Introduction‘ title, and paste it into your new post, where it says ‘Type / to choose a block‘.
On the right hand side of the page there are two tabs, ‘Post‘, and ‘Block‘. Click on ‘Post‘.
Make sure that the only option in the ‘Categories‘ section that’s ticked is ‘Articles‘.
In the ‘Featured image‘ section, click on the grey panel labelled ‘Set featured image‘, and upload the image you saved from either Pexels or Unsplash.
At the top, click the blue ‘Publish‘ button, and then confirm again.
Your new article is now published.